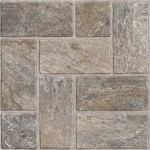
How To Install Tile Floor In Kitchen
Installing tile flooring in your kitchen can be a great way to update the look of your home. It is a relatively easy project to do yourself, and it can be completed in a weekend. Here are the steps on how to install tile floor in kitchen:
1. Prepare the subfloor
The first step is to prepare the subfloor. This means making sure that the subfloor is level, smooth, and dry. If the subfloor is not level, you will need to level it using a self-leveling compound. If the subfloor is not smooth, you will need to sand it down until it is smooth. And if the subfloor is not dry, you will need to let it dry completely before you begin installing the tile.
2. Install the backer board
Once the subfloor is prepared, you will need to install the backer board. Backer board is a thin layer of material that is installed over the subfloor to provide a smooth, stable surface for the tile. There are two types of backer board: cement backer board and gypsum backer board. Cement backer board is more durable than gypsum backer board, but it is also more difficult to cut and install. Gypsum backer board is easier to cut and install, but it is not as durable as cement backer board.
3. Install the tile
Once the backer board is installed, you can begin installing the tile. Start by laying out the tile in a dry fit to make sure that you have enough tile and that the tile is properly aligned. Once you are satisfied with the dry fit, you can begin installing the tile using thinset mortar. Thinset mortar is a type of adhesive that is used to bond the tile to the backer board. Apply the thinset mortar to the back of the tile using a notched trowel. Then, press the tile into place on the backer board. Use a level to make sure that the tile is level. Continue installing the tile until the entire floor is covered.
4. Grout the tile
Once the tile is installed, you will need to grout the tile. Grout is a type of material that is used to fill the joints between the tiles. Grout helps to keep the tile in place and it also helps to prevent water from seeping into the joints. Apply the grout to the joints between the tiles using a grout float. Then, use a damp sponge to clean the grout from the surface of the tile. Allow the grout to dry completely before you walk on the floor.
5. Seal the tile
Once the grout is dry, you will need to seal the tile. Sealing the tile will help to protect the tile from stains and wear. Apply the sealer to the tile using a sponge or a paintbrush. Allow the sealer to dry completely before you walk on the floor.
6. Enjoy your new tile floor!
Once the sealer is dry, you can enjoy your new tile floor! Tile floors are durable, easy to clean, and beautiful. They are a great way to update the look of your kitchen.

How To Tile A Floor Part 1 Preparation Youtube

Flooring Install Tiles On Top Of Laminate Floor In Kitchen Home Improvement Stack Exchange

How To Tile A Kitchen Floor

How To Install A Tile Floor The Home

How To Install Floor Tile Around A Kitchen Island With Wood Look Plank

How To Install A Tile Floor The Home

Diy Flooring How We Changed Our Kitchen In 3 Days For Less Than 400 Your Home Renewed

Installing Tile Floor For The First Time How To Lay

How To Install Peel And Stick Tiles On Kitchen Floor

6 Tips For Laying Floor Tile With No Experience Youtube


