Do It Yourself Tile Floor
Installing tile flooring is a great way to update the look of your home and add value to your property. While it may seem like a daunting task, it is actually a project that can be completed by do-it-yourselfers with the right tools and materials. Here is a step-by-step guide to help you get started.
1.
Prepare the subfloor.
The first step is to prepare the subfloor by making sure it is level, smooth, and clean. If the subfloor is not level, you will need to level it using a self-leveling compound. If the subfloor is not smooth, you will need to sand it down until it is smooth. And if the subfloor is not clean, you will need to clean it with a degreaser.2.
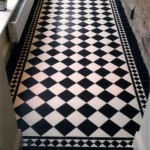
Lay out the tiles.
Once the subfloor is prepared, you can begin laying out the tiles. Start by finding the center of the room and then laying out the tiles in a straight line from the center. Once the first row of tiles is laid out, you can continue laying out the remaining rows of tiles.3.
Cut the tiles.
As you lay out the tiles, you will need to cut the tiles to fit around obstacles such as walls, doorways, and cabinets. To cut the tiles, you will need a tile cutter. A tile cutter is a tool that uses a diamond-tipped blade to cut through the tiles.4.
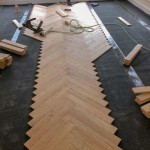
Set the tiles.
Once the tiles are cut, you can begin setting the tiles. To set the tiles, you will need a trowel and thinset mortar. Thinset mortar is a type of adhesive that is used to bond the tiles to the subfloor. To set the tiles, apply a thin layer of thinset mortar to the subfloor and then press the tiles into the mortar.5.
Grout the tiles.
Once the tiles are set, you will need to grout the tiles. Grout is a type of material that is used to fill in the joints between the tiles. To grout the tiles, apply a thin layer of grout to the joints and then use a grout float to spread the grout evenly across the joints.6.
Seal the tiles.
Once the grout has dried, you will need to seal the tiles. Sealing the tiles will help to protect the tiles from stains and dirt. To seal the tiles, apply a sealer to the tiles and then allow the sealer to dry.Installing tile flooring is a project that can be completed by do-it-yourselfers with the right tools and materials. By following the steps in this guide, you can install tile flooring that will look great and last for years to come.

How To Install A Tile Floor The Home

Installing Tile Floor For The First Time How To Lay Crafted Workshop

How To Install A Tile Floor The Home

How To Install A Tile Floor In Your Bathroom Dumpsters Com

Installing Tile Floor For The First Time How To Lay

How To Lay Tile Diy Floor Installation Lowe S

Tile Floor 101 Step By How To Install For The First Time

How To Lay Tile Diy Floor Installation Lowe S

How To Tile A Bathroom Floor

How To Install A Tile Floor The Home