How to Buff Engineered Hardwood Floors
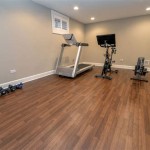
Engineered hardwood floors offer a compelling alternative to solid hardwood, providing a similar aesthetic with enhanced stability and resilience against moisture and temperature fluctuations. Composed of a thin layer of hardwood veneer bonded to multiple layers of core material, these floors are designed for dimensional stability and ease of installation. Over time, however, even engineered hardwood can accumulate scratches, scuffs, and a dull film, diminishing its original luster. Buffing is a valuable technique for restoring the shine and appearance of engineered hardwood floors, extending their lifespan and preserving their beauty. This article provides a comprehensive guide on how to properly buff engineered hardwood floors, outlining essential steps and considerations for achieving professional-quality results.
Before initiating any buffing process, it is crucial to determine whether the engineered hardwood floor is suitable for buffing. Factors such as the thickness of the veneer layer, the floor's finish type, and the presence of any existing damage must be carefully evaluated. Understanding these elements will dictate the appropriate buffing method and prevent potential harm to the floor.
Assessing the Suitability of Engineered Hardwood for Buffing
The thickness of the hardwood veneer is a primary determinant of whether buffing is feasible. Engineered hardwood floors typically feature a wear layer ranging from 1mm to 6mm. Buffing removes a small layer of the finish and potentially some of the veneer. If the veneer is too thin, aggressive buffing can expose the core material, causing irreparable damage. Floors with thicker veneers (3mm or more) are generally more resilient and can withstand several buffing cycles. Refer to the manufacturer's specifications to ascertain the veneer thickness of your specific flooring.
The type of finish applied to the engineered hardwood floor is another critical consideration. Common finishes include polyurethane, acrylic, and oil-based coatings. Polyurethane finishes are the most common and generally respond well to buffing. Oil-based finishes, on the other hand, may require specialized buffing techniques and products designed specifically for oiled floors. Acrylic finishes are less common but may be encountered in older installations. It's important to identify the finish type and use appropriate buffing pads and solutions to avoid damaging the surface.
A thorough inspection of the floor for existing damage is essential. Deep scratches, gouges, or areas where the finish has completely worn away cannot be rectified by buffing alone. These areas may require more extensive repairs, such as spot refinishing or plank replacement, before buffing can be considered. Buffing over severely damaged areas can exacerbate the problem and lead to uneven results.
Once the suitability of the floor for buffing has been confirmed, the next step involves gathering the necessary materials and equipment. Having the right tools will streamline the process and ensure a professional finish.
Gathering the Necessary Materials and Equipment
Buffing requires specific tools and materials to achieve the desired results without damaging the engineered hardwood. The primary equipment includes a floor buffer, buffing pads, a vacuum cleaner, and appropriate cleaning solutions.
A floor buffer is a motorized machine designed to polish and buff floors. Two primary types of floor buffers are available: rotary buffers and orbital buffers. Rotary buffers feature a single rotating pad and are typically used for more aggressive buffing and refinishing. Orbital buffers, also known as random orbital buffers, use a vibrating and rotating pad, making them safer and easier to control for novice users. For engineered hardwood, an orbital buffer is generally recommended as it is less likely to cause swirl marks or damage the veneer.
Buffing pads are essential for the buffing process. They come in various grades, from coarse to fine, each suited for specific tasks. Coarse pads are used for removing old finish or heavy scratches, while fine pads are used for polishing and restoring shine. Microfiber pads are excellent for final polishing and removing dust. For routine buffing, a medium-grit pad followed by a fine-grit or microfiber pad is typically sufficient. Different materials like felt, nylon, and lambswool are also available, each with different levels of abrasiveness.
A high-quality vacuum cleaner is crucial for removing dust and debris from the floor before and after buffing. A vacuum with a soft brush attachment will prevent scratching the floor while effectively removing particles. Use a vacuum specifically designed for hard floors to avoid damaging the surface.
Appropriate cleaning solutions are necessary for preparing the floor for buffing and for cleaning up afterward. Neutral pH floor cleaners are recommended as they are gentle and won't damage the finish. Avoid harsh chemicals, abrasive cleaners, and solvents, as these can strip the finish and discolor the wood. Always dilute the cleaning solution according to the manufacturer's instructions.
Beyond the core equipment, several additional items can enhance the buffing process. These include microfiber cloths for wiping up spills and dust, painter's tape for protecting baseboards and trim, knee pads for comfort during extended buffing sessions, and safety glasses and a dust mask to protect against airborne particles.
With the floor assessed and the materials gathered, the next crucial step is to thoroughly prepare the floor for buffing. The preparation stage is critical for ensuring a clean, smooth surface that will respond effectively to the buffing process.
Preparing the Engineered Hardwood Floor for Buffing
Proper preparation is paramount for achieving optimal results when buffing engineered hardwood floors. This process involves cleaning the floor to remove dirt, dust, and debris, protecting surrounding areas, and addressing any minor imperfections.
The first step in floor preparation is a thorough cleaning. Begin by vacuuming the entire floor surface to remove loose dirt, dust, and debris. Pay particular attention to corners, edges, and areas under furniture where dust tends to accumulate. After vacuuming, use a damp microfiber mop and a neutral pH floor cleaner to clean the floor. Avoid using excessive water, as this can seep into the seams and damage the underlying core material. Wring out the mop thoroughly to ensure it is only slightly damp. Follow the manufacturer's instructions for the cleaning solution’s dilution and application. Allow the floor to dry completely before proceeding to the next step.
Protecting surrounding areas is essential to prevent damage during the buffing process. Use painter's tape to mask off baseboards, trim, and any other surfaces that could be scratched or damaged by the buffer. Cover furniture with drop cloths to protect them from dust and debris. Removing any fragile or valuable items from the room. This will help minimize the risk of accidental damage and simplify the cleaning process after buffing.
Addressing minor imperfections before buffing can significantly improve the final results. Small scratches and gouges can often be concealed by using a wood touch-up marker or crayon that matches the color of the flooring. Fill in any gaps or cracks with wood filler, ensuring it is level with the surrounding surface. Allow the touch-up marker, crayon, or wood filler to dry completely before proceeding with the buffing process. Removing any sticky residue from spilled food or drink with a suitable cleaner designed for hardwood floors.
Once the floor has been thoroughly cleaned, protected, and any imperfections addressed, the actual buffing process can begin. This involves using the floor buffer with appropriate pads to restore the floor's shine and remove minor scratches and scuffs.
The buffing process requires a systematic approach to ensure consistent results and prevent damage to the engineered hardwood floor. This includes selecting the appropriate buffing pad, applying light pressure, and overlapping each pass to achieve a uniform finish.
Executing the Buffing Process
The selection of the appropriate buffing pad is critical. For routine maintenance and light scratch removal, start with a medium-grit buffing pad. This will help to remove any surface imperfections without being overly abrasive. If the floor has more significant scratches or a dull finish, consider using a slightly coarser pad, but exercise caution to avoid damaging the veneer. Always test the pad in an inconspicuous area first to ensure it doesn't scratch or dull the finish. For the final polish, switch to a fine-grit or microfiber pad to enhance the shine and remove any remaining dust or residue.
When using the floor buffer, it is essential to apply light, consistent pressure. Avoid pressing down too hard on the buffer, as this can cause swirl marks or damage the finish. Let the weight of the machine do the work, and guide it gently across the floor. A consistent, even pressure will ensure a uniform buff and prevent uneven wear.
Overlap each pass by approximately 25% to ensure complete coverage and avoid leaving any unbuffed areas. Work in small, manageable sections, and move the buffer in a consistent pattern, such as back and forth or in a circular motion. Avoid stopping the buffer in one spot, as this can create a localized hot spot and damage the finish. Keep the buffer moving at a steady pace to achieve a smooth, even finish.
After buffing, thoroughly inspect the floor for any remaining imperfections or areas that require additional attention. If necessary, repeat the buffing process in those areas, using the appropriate pad and technique. Once you are satisfied with the overall appearance, vacuum the floor thoroughly to remove any dust or debris generated during the buffing process. Use a soft brush attachment to prevent scratching the newly buffed surface.
Finally, clean the floor with a damp microfiber mop and a neutral pH floor cleaner to remove any remaining residue and enhance the shine. Allow the floor to dry completely before replacing furniture or walking on it. Following these steps will ensure a professional-quality buff and restore the beauty of your engineered hardwood floor.

Hardwood Floors After A Clean Screen And Recoat

Restoring Engineered Hardwood Floors Full Of Residue Recoating With Semi Gloss Finish

How To Buff And Cover A Hardwood Floor Youtube

Buffing Vs Sanding Hardwood Floors Expert Guide

Buff And Recoat Hardwood Floors

Mastering The Art Of Refinishing Engineered Wood Floors

How Often Should You Buff Your Hardwood Floors Mr Sander

Engineered Wood Floors Cleaning And Polishing Kiwi Services

A Guide To Refinishing Hardwood Floors Norton Abrasives Us And

Restoring Hardwood Floors By Removing Wax Build Up Then Recoating With Polyurethane