How To Create A Floor Plan
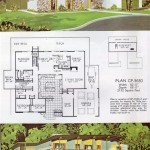
A floor plan is a drawing that shows the layout of a building. It can be used to plan the construction of a new building, or to renovate an existing one. Floor plans are also used by real estate agents to market properties, and by interior designers to help clients visualize the potential of a space. Creating a floor plan is not difficult, but it does require some basic drafting skills. With a little practice, you can create professional-looking floor plans that will help you to communicate your design ideas clearly.
1. Gather Your Information
Before you start drawing, you need to gather some basic information about the building or space you are planning. This includes:
- The dimensions of the building or space
- The location of windows and doors
- The location of fixed objects, such as stairs or fireplaces
If you are planning to renovate an existing building, you may also need to consult with a structural engineer to ensure that your plans are feasible.
2. Choose A Scale
The scale of your floor plan will determine how much detail you can show. A larger scale will allow you to show more detail, but it will also make your drawing larger. A smaller scale will allow you to show less detail, but it will also make your drawing smaller and easier to handle.
The most common scale for floor plans is 1/4 inch = 1 foot. This scale allows you to show a reasonable amount of detail without making your drawing too large.
3. Draw The Outline Of The Building
The first step in creating a floor plan is to draw the outline of the building. This can be done using a ruler or a drafting triangle. Be sure to draw the outline to scale.
4. Add The Interior Walls
Once you have drawn the outline of the building, you can start adding the interior walls. Interior walls can be drawn using a ruler or a drafting triangle. Be sure to draw the walls to scale and to the correct thickness.
5. Add The Windows And Doors
Once you have added the interior walls, you can start adding the windows and doors. Windows and doors can be drawn using a ruler or a drafting triangle. Be sure to draw the windows and doors to scale and to the correct size and location.
6. Add The Furniture And Fixtures
Once you have added the windows and doors, you can start adding the furniture and fixtures. Furniture and fixtures can be drawn using a ruler or a drafting triangle. Be sure to draw the furniture and fixtures to scale and to the correct size and location.
7. Label The Rooms
Once you have added the furniture and fixtures, you can start labeling the rooms. Rooms can be labeled using a pencil or a pen. Be sure to label the rooms clearly and concisely.
8. Review Your Floor Plan
Once you have finished drawing your floor plan, take some time to review it. Make sure that all of the information is correct and that the drawing is to scale. If you find any errors, correct them before finalizing your floor plan.

How To Create Floor Plan

Floor Plans Learn How To Design And Plan

Floor Plan Creator And Designer Free Easy App

Floor Plans Learn How To Design And Plan

How To Create A Floor Plan And Furniture Layout Hgtv

How To Draw A Floor Plan The Simple 7 Step Guide For 2024

Blender For Noobs 10 How To Create A Simple Floorplan In Youtube

How To Create A Floor Plan Before You Move

How To Create A Basic Floor Plan In Photoshop Hunny I M Home

How To Create A Floor Plan Using Conceptdraw Pro For The Classroom Draw Furniture Plans


